The Editing Process
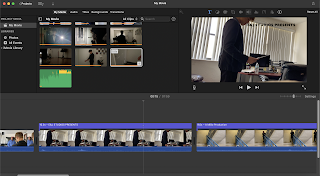
Editing is finished, and this blog will be describing the first part of the editing process. After filming was finished, the editing process was started and now all of my project work had shifted into computer work. The first thing I had to work on was the transitions. This is my third time using iMovie, and I still believe it is a great and easy to use software. However, a sudden realization was made early into editing. This was that the software would take lots of time and effort to figure out. The good thing is, there is a very easy solution to this problem. As I quickly figured out, there are many YouTube videos on how to use iMovie. These videos will provide a clear description as to what I need to do in order to get the visual effect I desire. For example, the first challenge faced by me when starting this project was getting the fade in from black and the fade to black that my project needed. I spent much time looking on how to do it, frustrated. Finally, I gave in and decided to look it up. This is where I found the plethora of YouTube videos made to help people like me that are new to editing and are using iMovie. The good thing is, now I can view these videos in order to gain a deeper understanding of the software as a whole. So, now I can use different visual effects that I did not know of before. In this way, I can experiment with my opening sequence and find effects that might fit with my project. I started by cutting the scenes to size, and all in all, I found that there is more than 2 minutes of content. This is good, because it means that I don't have to record any more film than I already have. After doing this, I have started putting the titles on the screen, and finished the editing session when I did about half. The next blog will show the second half of the editing process, and will include the difficulties experienced when doing this second half.


Comments
Post a Comment